Having a patio in your house is a blessing not everyone can afford. It takes a sufficient amount of time, planning, and effort to turn what may appear an easy task into a successful one. But there is no reason to be worried. Building a patio on a slope is not that difficult if you know what you are doing and if you have less experience with it, you can hire patio builders for that. Follow below for some tips that will help you build a patio on a sloped ground and ensure you move in the right direction every step of the way.
Prepare For The Construction
The most important step, which is also sometimes the most underestimated or neglected, is preparation for the construction. You might think that you or the experts will spend a couple of hours preparing the base and all that and everything will be good to go.
The fact of the matter is that it can take anything from a few hours or days to prepare the site for construction. In addition to the major things, the small details need to be taken care of as well. For instance, if you have some pipes or electrical networks running underground, you will have to mark them.
Plus, if you have some outdoor decorations or fences installed, you will need to remove them as well. Once that is done, you will need to analyze the area and measure the dimensions that will help decide the size of the patio. Remember, this is an important step and you need to be as precise with the measurements as possible.
And, if you plan on working on the project yourself, you will need to invest in the right tools. Keep in mind that things might be expensive. And if you’re also updating your pool, we will suggest handing the task over to an expert.
Excavating The Area
If you have made a final decision to build the patio on your own, you will need to grab a spade and shovel to excavate six inches into the soil. When digging, you need to do it from the lowest area. While working your way towards the highest slope, you will need to dig relatively more soil to make the area level.
Do not make estimates or play guessing games here down the road. The last thing you would want is an unlevel patio. So, it will be safer if you use a level to ensure the area is perfect. Then, you should buy or rent a tamper that you will use to compact.
After compacting the soil, you should move to the step of laying three inches of gravel on it. This gravel layer will be used as the foundation for the patio pavers. Then, use the tamper to compact the gravel. Again, use the level to ensure the gravel is flat and even.
Use Stakes To Mark The Area
Once the area has been properly excavated and the soil is compacted, you have to determine the slope. For this, you should strap a level to a 10-foot, flat board. Then, use a measure tape to take measurements from the top to the bottom at various parts. This is an important but tricky part to perform it carefully and take measurements twice.
As a general rule of thumb, patios should be sloped only 2%. In other words, this means a 1-inch drop over 100 inches. Meanwhile, walkways can be sloped by 5%. But the walking area should be non-slip. The point of such a percentage or slope is safety.
You might have kids or elderly walking over the sloped patio and there is a risk of slipping if the slope is too high. But, if you still wish to have a higher slope, you can excavate the higher area, which means digging out a bit more. Whichever slope you choose, you should also build a retaining wall. Hire retaining wall builders Long Island who can also help you with the patio.
Install The Paver Bedding Course
What is a bedding course? When you lay and screed about one inch of coarse sand on the gravel you have compacted, it’s called a bedding course. Now, this is the base on which the patio pavers are installed. Screeding is a relatively easy process that helps to achieve a flat surface.
All you need to do is install 10-foot and 1-inch diameter pipes over the gravel. The height of these pipes will be adjusted according to the slope you desire. This can be done by adding a handful of screeding material under the pipes or removing it if you wish to lower the pipes.
After achieving the desired slope, add a bit of bedding material to cover the pipes but make sure not to bury the pipe altogether. Then, use an aluminum straight edge or a long straight board to remove or spread the excess material, which will leave a level surface.
Finally, remove the pipes, cover the void with the bedding material, and use a tool to properly cover and spread them.
Install The Pavers
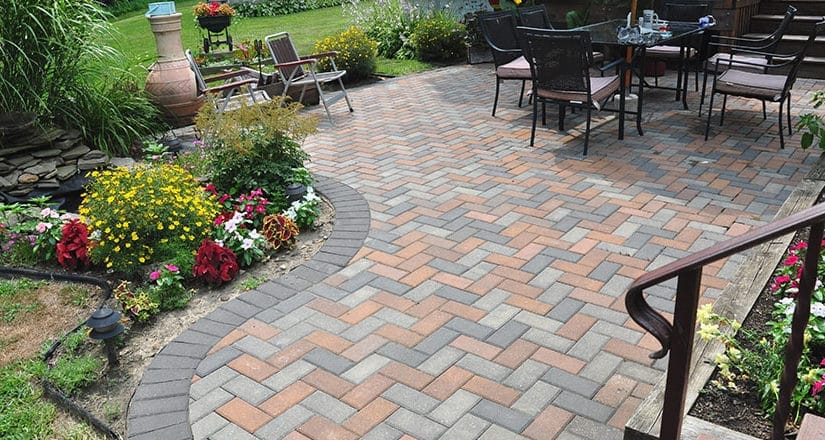
Now that the surface is perfectly level and flat, begin installing pavers in the pattern according to the design from the lower installation point to the highest. You can install a string line to ensure you are going in a straight line. Make sure not to place the pavers too close to each other and do not use a mallet to hammer the pavers in place.
Cut The Pavers To Fit
Even if you order custom designs or size pavers, they will still need to be cut or adjusted. The reason is that there is a slight inaccuracy in measurements and readings sometimes and you will need to cut the pavers to make them fit properly. You can borrow or rent a diamond blade masonry saw to perform this task.
Before you can cut the pavers, you should take proper measurements and readings and mark using a pencil or marker as well. Most importantly, make sure to wear safety gear to protect your exposed body parts. Cutting pavers is a huge risk and leaves you at the mercy of the strong blades. To protect yourself from serious injuries, you should invest in safety gear.
Compacting The Pavers
The final step of the process is compacting the surface of the pavers using a vibratory plate compactor. Make sure the compactor comes with an anti-scuff pad to prevent scratching the surface of the pavers. If possible, you can also opt for a special compactor fitted with rubber rollers.
Make sure the pavers are free of dirt, debris, and other factors that might scratch the surface while compacting. Getting rid of scratches can be a tough task and will require additional money, time, and effort. So, be patient and give the process some time instead of hurrying.
Conclusion
If it is your first time, you will need to practice patience and keep some space for unexpected complications. Otherwise, you always have the option of hiring a patio contractor Long Island who will ensure a much better job in a relatively short amount of time.


